It's feeling more and more like fall here in the Mitten! Hooray!

The family has already hit the cider mill and enjoyed some spice donuts :) While shopping at our fav craft stores today we noticed the fall seasonal items were half off (*happy dance). I love any reason to shop a sale so I thought it would be a good time to get some use out of a wreath that was left over from my wedding and sitting very sad in the sister's basement. It was also an opportunity to get the look of the store made harvest wreaths while on a budget.

So here is how we made this lovely fall
wreath on a budget.
What you'll need:
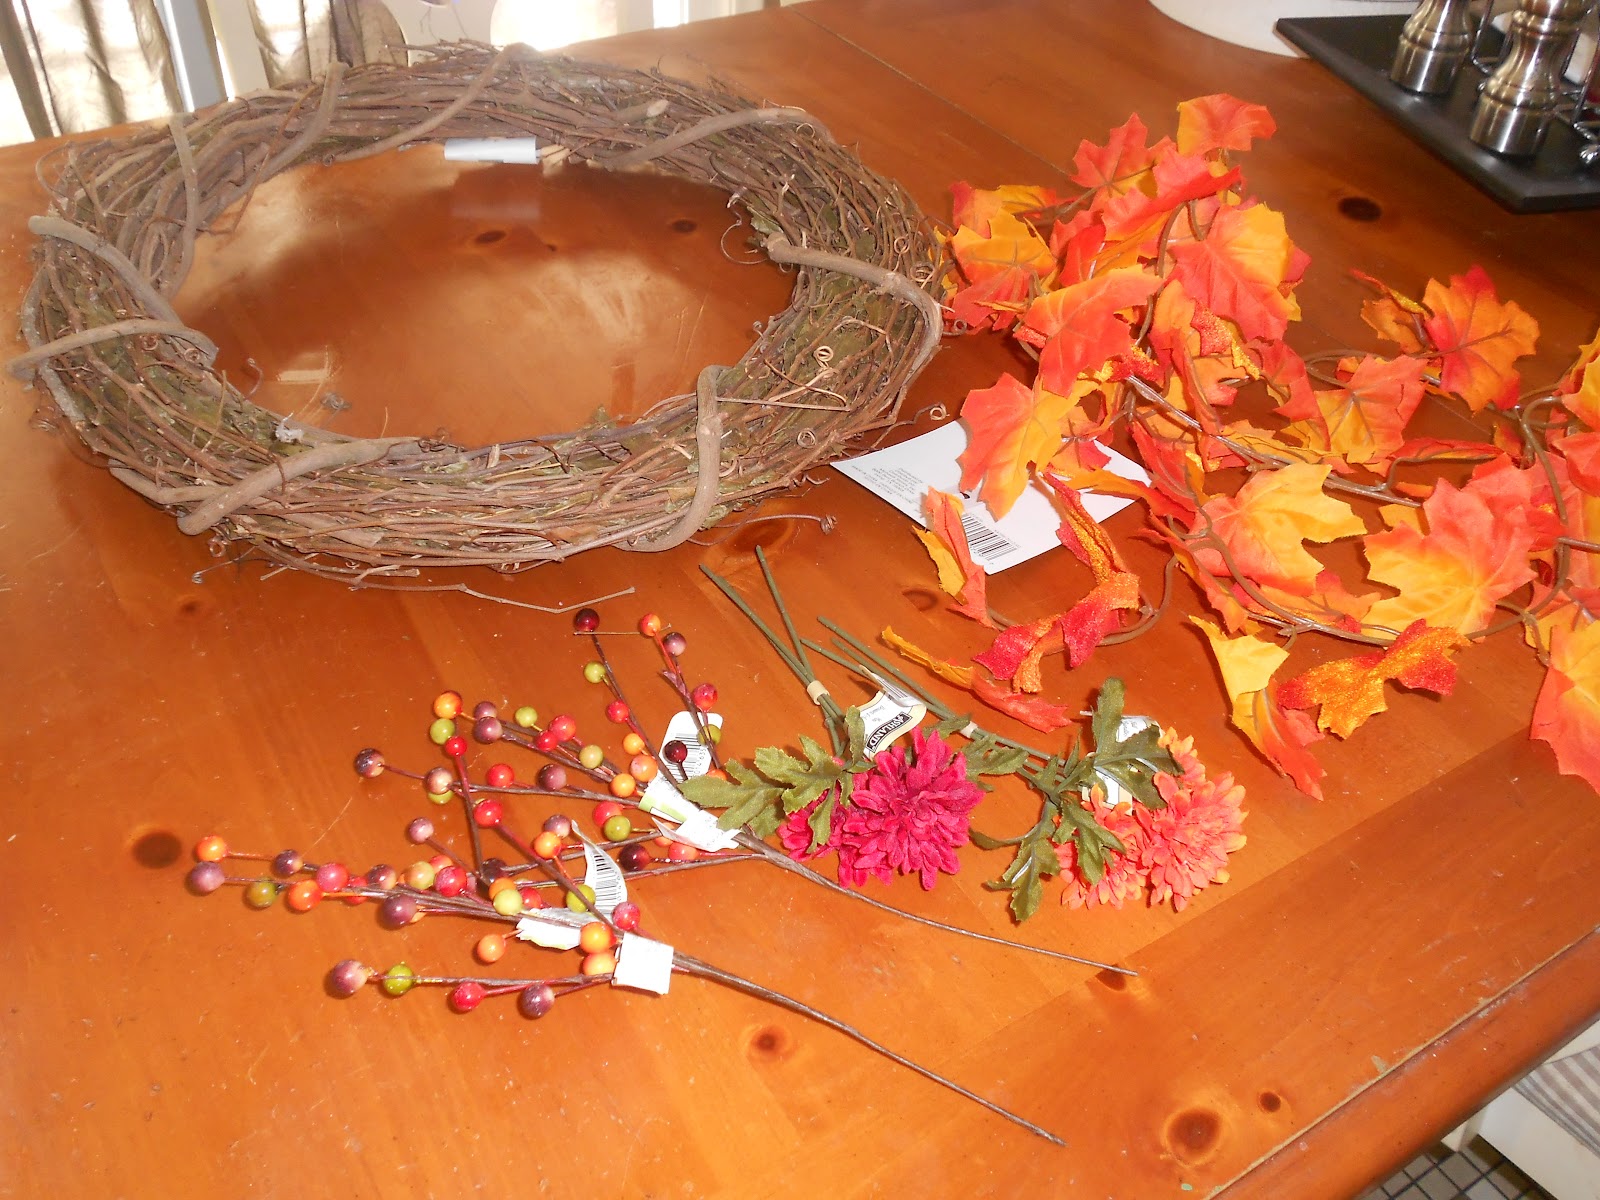
A branch or foam (if you are ambitious) wreath
Fall Foliage (we chose a leaf garland) or seasonal flowers
Fall Floral Picks
Wreath hanger (is that the official name? ha)

First, we wrapped the leaf garland around the wreath making sure to "fluff" (as I like to call it) the leaves as we went so they looked just right.
 |
| The fully wrapped wreath. Still needs some adjusting but it is starting to look like fall! |
 |
| Berry pick before and after. |
 | ||||||
| Fall Berries and Foliage |

The last addition to our simple wreath were some inexpensive mum picks. We simply tucked these in where the wreath looked bare. We decided the green leaves were throwing off the color scheme so we removed them. Voila!

Welcome Friends and Welcome Fall! Try out a wreath for yourself and let us know how it turns out!

Project Budget:
Wreath: $3.99 JoAnne's
Garland: $2.99 on sale for 50% off Micheals
Fall Berry Pick: .77 cents on sale (2) 50% off
Min-Mum Stems: $1.00 (2) Micheals retail
Total Project Cost: $10.52
No comments:
Post a Comment